Blog · 9 November 2026
How to Film Yourself Surfing Without a Cameraman
By Guillaume Hamez, founder of Reeve
I can spend two hours in the water at Les Cavaliers and come home without a single second of video of myself. When I do get footage, it’s often humbling. I’m standing further back on the board than I thought, I’ve rushed a turn, or the wave I thought I’d surfed well had a lot more in it than I used.
A cameraman costs money, the beach webcams are too far away to show anything useful, and a friend will stand on the sand for two hours exactly once.
So I started building Reeve, an iPhone app that spots surfers and records their waves on its own. I’ve been filming my sessions with it for almost a year now on an iPhone 16 Pro, and this is the setup I’ve settled on.
The gear
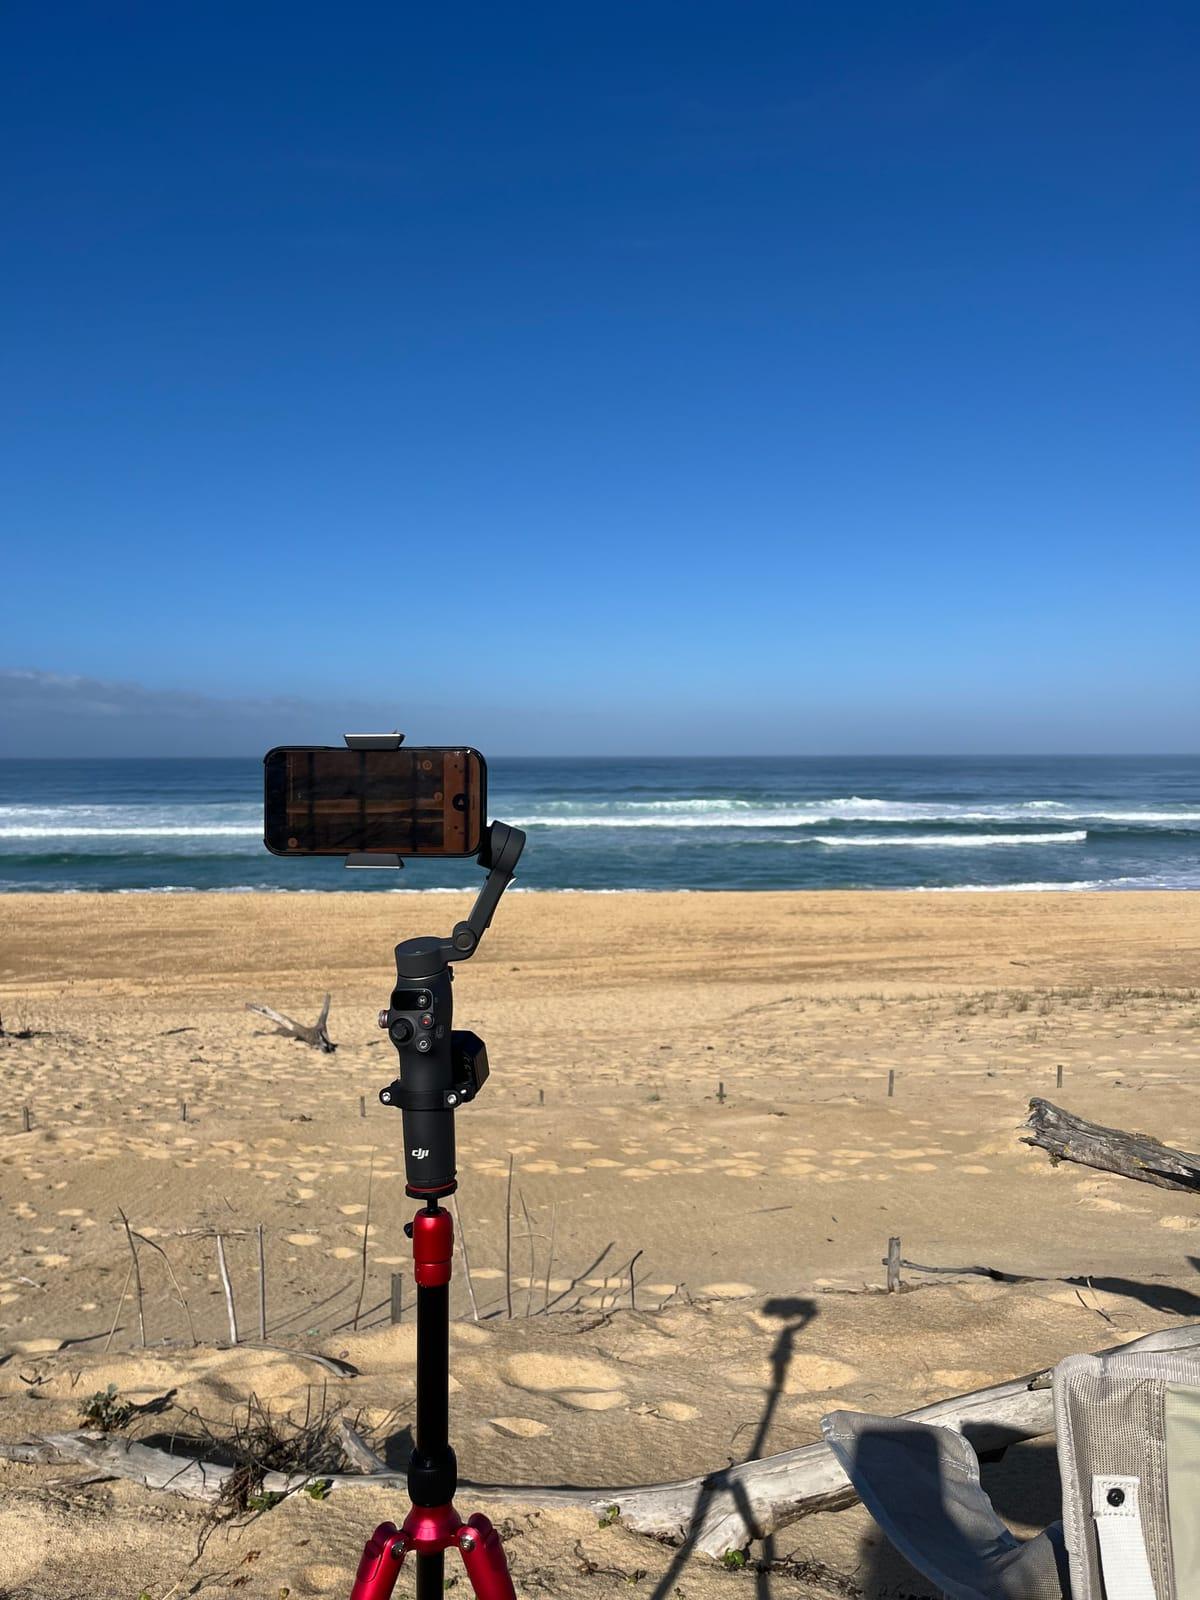
An iPhone and a tripod
That’s all you need to start. Mount the phone on a tripod, point it at the peak and open Reeve: the app spots the surfers in the frame and records their waves.
A tripod with a phone mount costs $30 to $60. Get one that reaches at least 1.5 meters (more on why below) and doesn’t shake in the wind. If it’s your first time with Reeve, I’ve written a guide to getting started with a fixed tripod.
A gimbal to follow the surfer
With a compatible motorized gimbal, such as a DJI Osmo Mobile, a DJI RS or an Insta360 Flow, Reeve turns the phone to follow a surfer down the line instead of watching one fixed patch of water. Because the phone turns with them, you can zoom in much closer than on a fixed tripod.
You don’t need one, but it’s the upgrade I’d buy first. The setup is in my gimbal guide.
A telephoto lens
A clip-on telephoto lens is for two kinds of surfer: those filming a spot that breaks a long way out, and those who want higher-quality footage even at the usual distance. With the SANDMARC 2× on my iPhone 16 Pro, the clips come close to what a professional camera gives you. It makes the setup more expensive, so it comes down to your budget and how much that quality is worth to you.
Where to put the tripod
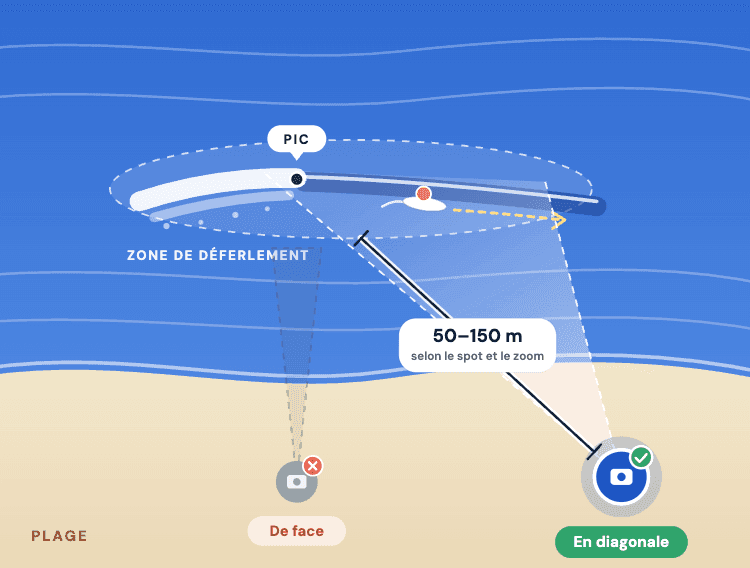
Where you stand matters as much as what you film with. Good gear won’t save footage shot from too far away, into the sun, or at the wrong peak.
Off to the side of the peak
I set up a little to the side of the peak rather than straight in front of it. From an angle you see the surfer travel along the wave, so their lines and turns read much better on screen.
Somewhere between 50 and 150 meters from the peak works well. Past 150 meters Reeve still works, but only on a recent iPhone with enough zoom, and the image quality drops. Some spots break even farther out than that, and that’s where a telephoto lens earns its place.
Up high
I put the phone 1.5 to 2 meters off the ground, high enough that people walking past and the shorebreak don’t block the view. If it’s windy, weigh the tripod down with a sandbag so it stays put.
Optical zoom only
Pro iPhones have a telephoto camera, and its optical zoom gives a much cleaner picture than digital zoom. On my iPhone 16 Pro that’s 5×, and I film at 5× almost all the time. I rarely go past it, except to test something or on a spot that breaks especially far out. The optical zoom isn’t the same on every Pro model, so check what yours has and stick to it.
With a fixed tripod, keep the frame wide enough that surfers stay in it. With a gimbal you can zoom in further, because Reeve turns the phone to follow them.
The sun behind you
Don’t film into the sun. Backlit, a surfer far out turns into a dark shape on bright water. If you can, set up with the sun behind you or off to one side.
Recording a session
Once the tripod is in place, there are four steps.
1. Set up the iPhone
Mount the phone and point it at the peak you’ll be surfing. If you’re using a gimbal, connect it to Reeve.
2. Open Reeve
Pick your spot and set the zoom. Before you start, check that green boxes appear around the surfers in the lineup: that’s how you know Reeve can see them. If the boxes come and go, change the zoom or the angle until they stay.
3. Start recording
Reeve tracks the surfers in real time and saves a clip of every wave it picks up. With a gimbal, the phone also turns to follow them.
4. Go surf
After two hours in the water, my iPhone 16 Pro is down 60 to 70%. For longer sessions, plug in a power bank.
When you paddle in, your waves are already cut into separate clips. You don’t have to scrub through two hours of footage to find the few seconds you actually spent on a wave.
Won’t someone steal your phone?
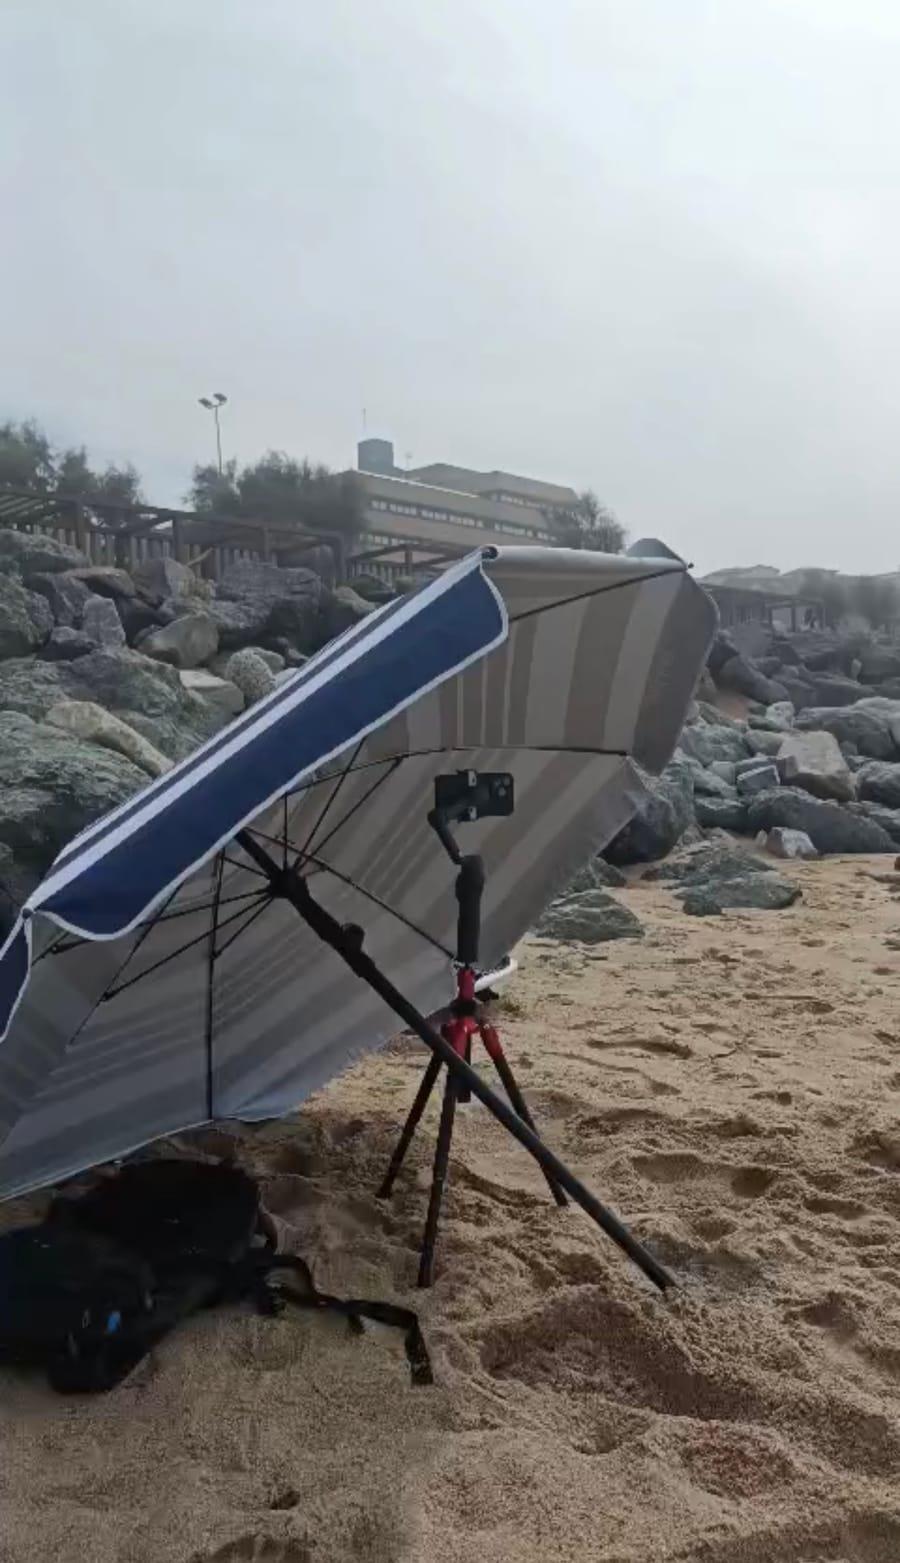
It’s the question I get asked most. Leaving an iPhone alone on the sand while you paddle out makes most people nervous, and I get why. The safest answer is a friend who keeps an eye on it from the beach. When I surf alone, this is what I do.
Lately I’ve been hiding the setup under a beach umbrella. The gear is much harder to spot from a distance, and depending on how you angle it, the umbrella also keeps off some wind and light rain. That’s how I filmed the sessions in this article, in Anglet, on beaches that weren’t busy at the time.
I also pick a quiet part of the beach, where the tripod isn’t in anyone’s way and, ideally, where I can see it from the water.
Two more things are worth doing. A small motion alarm clipped to the tripod goes off loudly if someone moves it, and Find My lets you locate the phone if something does happen.
There’s no such thing as zero risk. But an alarm and a well-hidden setup already cut it a lot. Just pick a spot where you’re comfortable leaving your gear.
Finding your waves afterwards
Finding your own waves
Reeve records every surfer it detects, not just you, so after a session you’ll have clips of whoever was out with you. It sorts them by surfer, so you can find your own waves without opening every video. If you surfed with friends, send them the whole session through a private link and they’ll find theirs.
Watching yourself back
The gap between the wave I thought I surfed and the one on screen is what I find most useful. To dig into it, Reeve lets you draw on a clip, add notes and compare your wave with a reference maneuver, which helps when you’re working on one thing in particular.
Exporting a clip
Once you’ve found a wave you like, you can reframe it and export it in 9:16, 1:1, 4:5 or 16:9, then save it to your phone or post it on Instagram, TikTok or anywhere else.
Your next session
When I started building Reeve, I didn’t know if an iPhone on a tripod could do this job. After almost a year, I’m still surprised how well it does it. Not every wave comes out perfectly, and a lot depends on the conditions, the distance and the setup. But I still like paddling in and finding my waves already cut into clips, without anyone having stood on the sand for me.
If you have a compatible iPhone, try Reeve on your next session. It’s free to download, and I’d like to hear what works for you and what doesn’t.